Setting up Distributed Storage System in k3s with Longhorn
Introduction
Longhorn is a lightweight, Kubernetes-native distributed block storage system. It provides persistent storage for workloads that need data to survive pod restarts, rescheduling, or node failures.
Longhorn works by attaching a volume controller (engine) to a pod and storing replicated data across multiple nodes. If a node goes down, another replica can take over, keeping the volume available.
Prerequisites
- Working k3s environment. At least 3 nodes are recommended for full replication and high availability. Check out this guide for more information: High-Availability k3s Cluster Guide with k3sup and kube-vip
- A dedicated partition or extra unallocated space on your nodes is recommended, though not strictly required.
-
Longhorn relies on host-level binaries to manage block devices and network file sharing. Run the following commands on every node in your cluster:
A. open-iscsi (Block Storage Support)
Longhorn uses iSCSI to expose block devices to your pods.
# Ubuntu / Debian
sudo apt update && sudo apt install -y open-iscsi

# RHEL / CentOS
sudo yum install iscsi-initiator-utils -y
After installation, ensure the service is running:
sudo systemctl enable --now iscsidB. nfs-common (ReadWriteMany Support), dm-crypt for encryption
To support
ReadWriteMany(RWX) volumes (where multiple pods access the same volume), Longhorn needs an NFS client.# Ubuntu / Debian sudo apt update && sudo apt install -y nfs-common cryptsetup # RHEL / CentOS sudo yum install nfs-utils -y # Load modules sudo modprobe nfs sudo modprobe nfsd sudo modprobe dm_cryptC. Other Utilities
Ensure these common tools are present (most are pre-installed on standard distros):
-
bash,curl,findmnt,grep,awk,blkid,lsblk,jq
-
- Download the latest Helm release:
curl https://raw.githubusercontent.com/helm/helm/main/scripts/get-helm-3 | bash #Verify helm version - Fix KubeDNS Warning (optional but recommended)
-
Longhorn relies heavily on DNS for volume attachments. Having only one CoreDNS pod (the k3s default) creates a single point of failure.
To increase the replica count to 2:
kubectl scale deployment coredns -n kube-system --replicas=2
-
-
Longhorn provides a handy script to check if your cluster is truly ready. Run this on your non k3s/remote terminal, and then check for errors:
Bash# For AMD64 platform curl -sSfL -o longhornctl https://github.com/longhorn/cli/releases/download/v1.10.1/longhornctl-linux-amd64 # Anticipated error, create longhorn namespace kubectl create namespace longhorn-system # Execute chmod +x longhornctl ./longhornctl check preflight
Installation
-
Add the Longhorn Helm repository:
helm repo add longhorn https://charts.longhorn.io -
Fetch the latest charts from the repository:
helm repo update -
Install Longhorn in the
longhorn-systemnamespace.helm install longhorn longhorn/longhorn --namespace longhorn-system --create-namespace --version 1.10.1 -
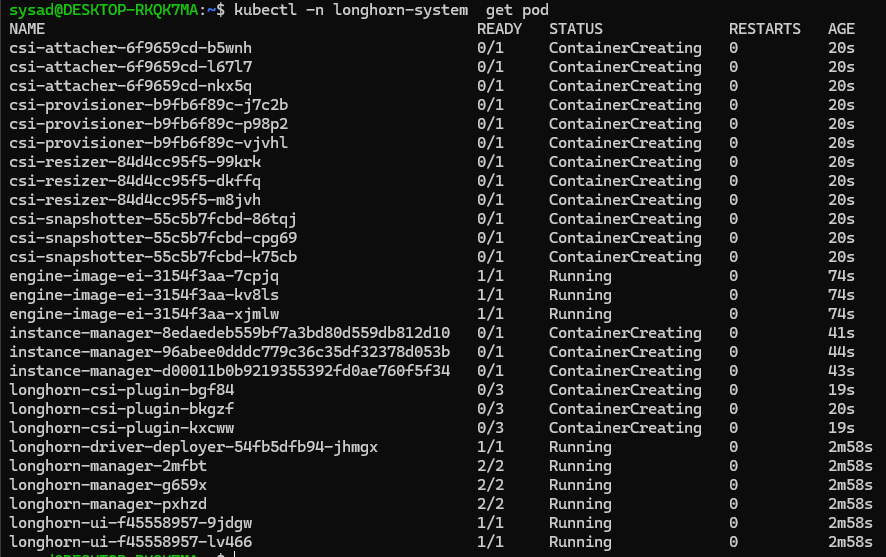
To confirm that the deployment succeeded, run:
kubectl -n longhorn-system get podThe result should look like the following:

Additional Configuration
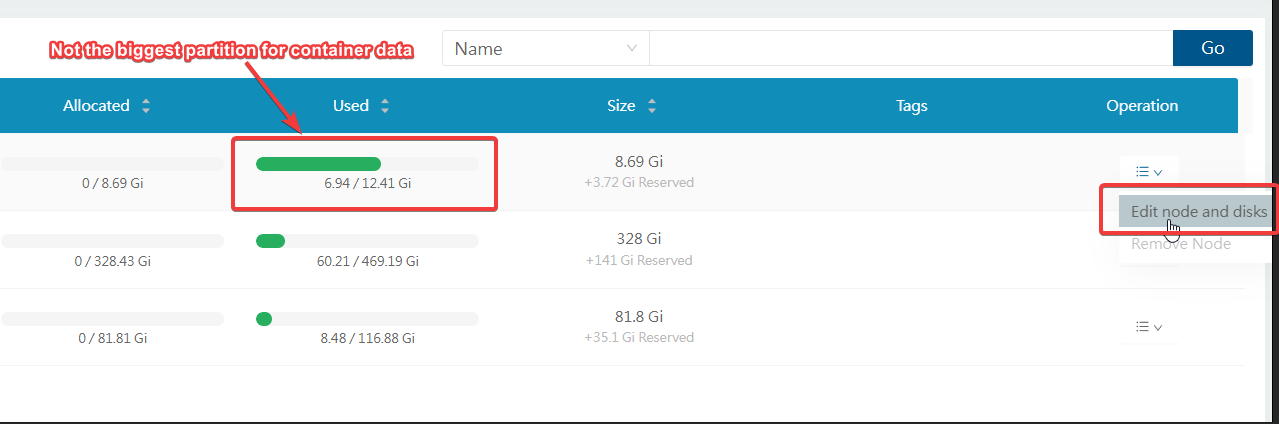
By default, Longhorn stores it's data per node at /var/lib/longhorn. You may want to configure this if that default location is in a small partition/slow performing like an SD card (if you are using Raspberry Pi), and you want to use another partition or drive that has larger capacity and faster.
A quick way to do this is via Longhorn UI. Run this command to expose it temporarily:
kubectl port-forward -n longhorn-system svc/longhorn-frontend 8080:80Now you can browse it via http://127.0.0.1:8080/
Click on "Edit node and disks"
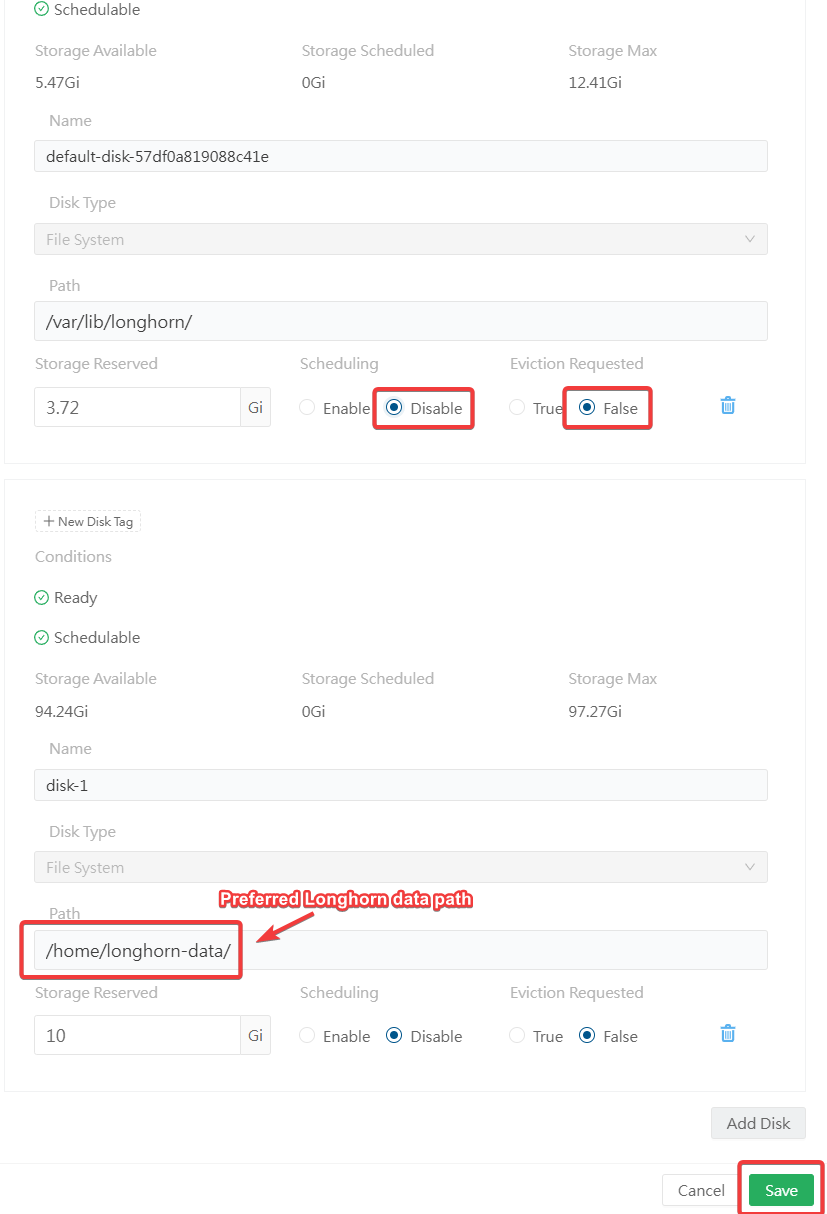
Click "Add Disk"

Create your new Longhorn folder
mkdir /home/longhorn-dataFrom here, define the new Longhorn path on the new disk that you added. You may want to remove the old path by disabling "Scheduling" and setting "Eviction Requested" to "False". Click Save.