Tactical RMM Installation Guide
Introduction
Tactical RMM is a remote monitoring & management tool, built with Django and Vue.
It uses an agent written in Golang and integrates with MeshCentral.
Features
- TeamViewer-like remote desktop control
- Real-time remote shell
- Remote file browser (download and upload files)
- Remote command and script execution (Bash, Batch, PowerShell, Python, Nutshell, and Deno scripts)
- Event log viewer
- Services management
- Windows patch management
- Automated checks with email/SMS/Webhooks alerting (CPU, disk, memory, services, scripts, event logs)
- Automated task runner (run scripts on a schedule)
- Remote software installation via chocolatey
- Software and hardware inventory
Prerequisites
- A fresh Linux machine running either Debian 11, Debian 12 or Ubuntu 22.04 LTS with at least 4GB RAM on x64 or aarch64 (arm64) architecture. Installing on a Docker container is also possible but not recommended (refer to https://docs.tacticalrmm.com/install_considerations/ and https://docs.tacticalrmm.com/install_docker/)
- A TOTP based authenticator app like Google Authenticator
- SSH Client like PuTTY
- Domain name
Installation
1. Update and upgrade OS
As root, run these command to apply update OS. It will also install ufw.
apt update
apt install -y wget curl sudo ufw
apt -y upgrade
Tip: Always reboot after installing updates especially if the kernel is updated to avoid running into problems.
2. Setup DNS Records
The RMM uses 3 different sites. The Vue frontend e.g. rmm.example.com which is where you'll be accessing your RMM from the browser, the REST backend e.g. api.example.com and MeshCentral e.g. mesh.example.comrmm. api. and mesh. are what we recommend, but you can use whatever you want if they're already in use.
Warning: All 3 domain names MUST be at the same subdomain level because you only get one LetsEncrypt wildcard cert, and it'll only apply to that level of DNS name.
FAQ: Can I run Tactical RMM locally behind NAT without exposing my RMM server to the internet?
Option A: If you have a public IP and port forwarding capabilities
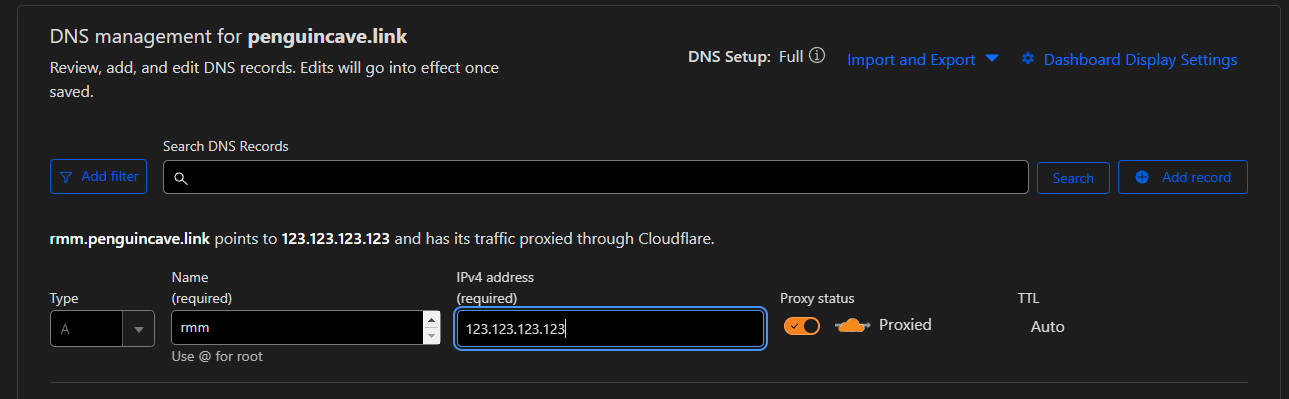
While updating, you can also go ahead and configure your DNS records by adding A records on wherever your domain is hosted. Create 3 A records: rmm, api and mesh and point them to the public IP of your server.
Option B: If you do not have a public IP (CloudFlare Tunnel)
Skip to Step 4 if you proceed to setup with Option A.
Tip: You can also refer this video tutorial.
To setup your domain to CloudFlare, please refer to: https://developers.cloudflare.com/fundamentals/setup/
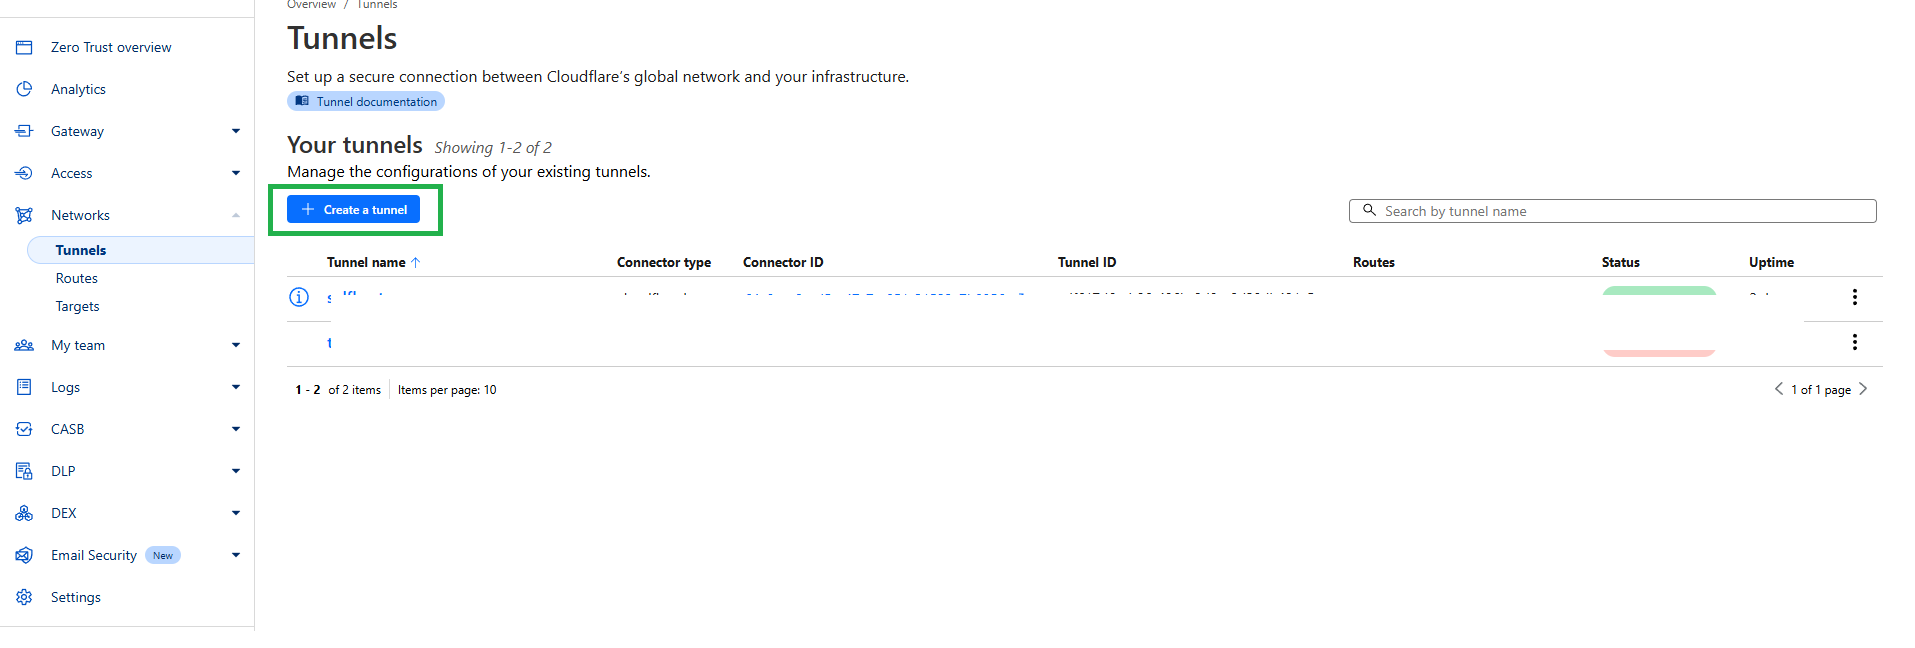
Assuming you already connected and configured your domain, you need to create a tunnel. To create a tunnel, log in to Zero Trust ↗ and go to Networks > Tunnels, then select Create Tunnel on the Tunnel page.
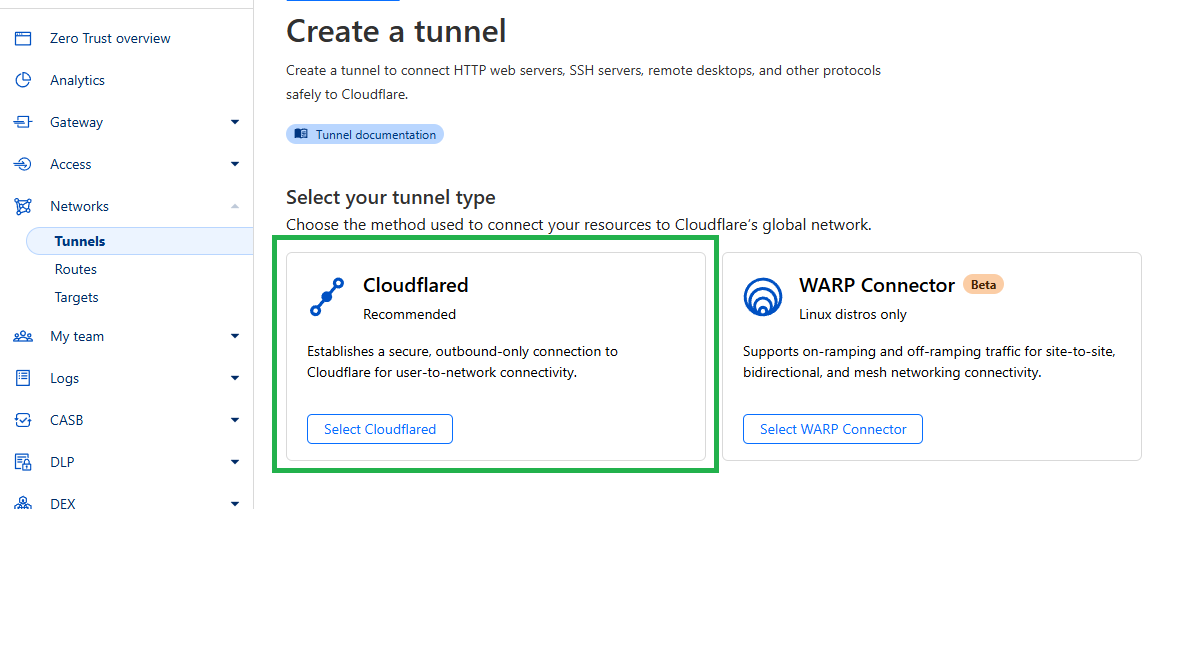
Select Cloudflared as your tunnel type
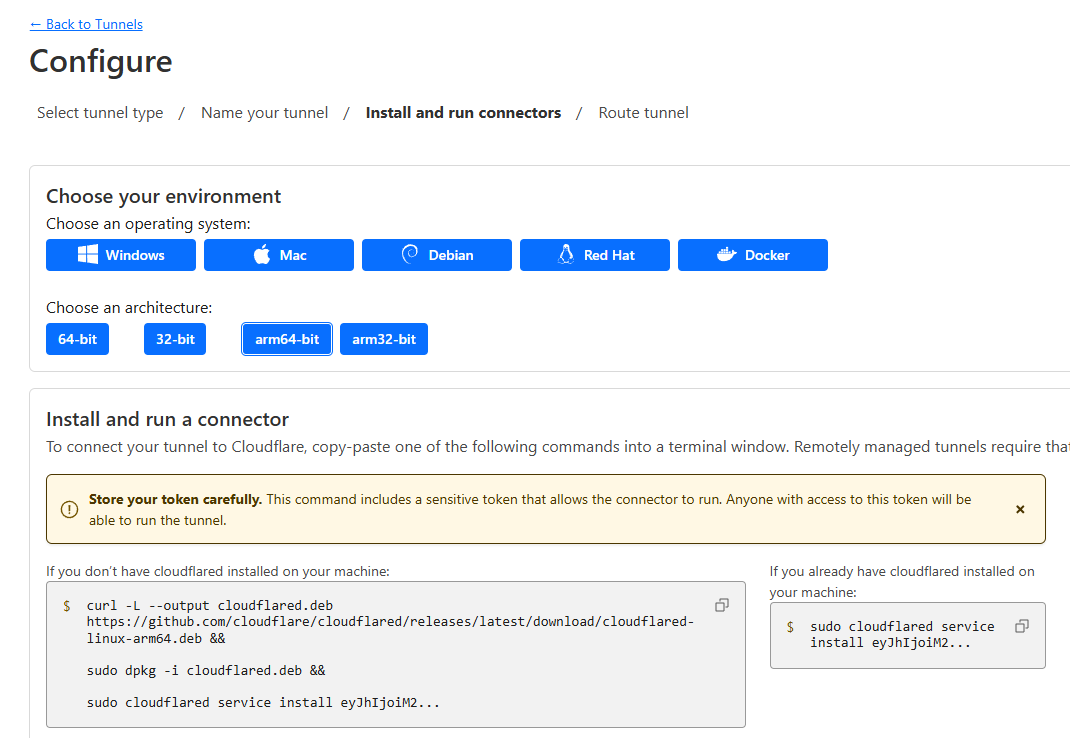
Name your tunnel, then choose your OS and architecture. Install and connect your cloudflared tunnel by executing the code below, as required.
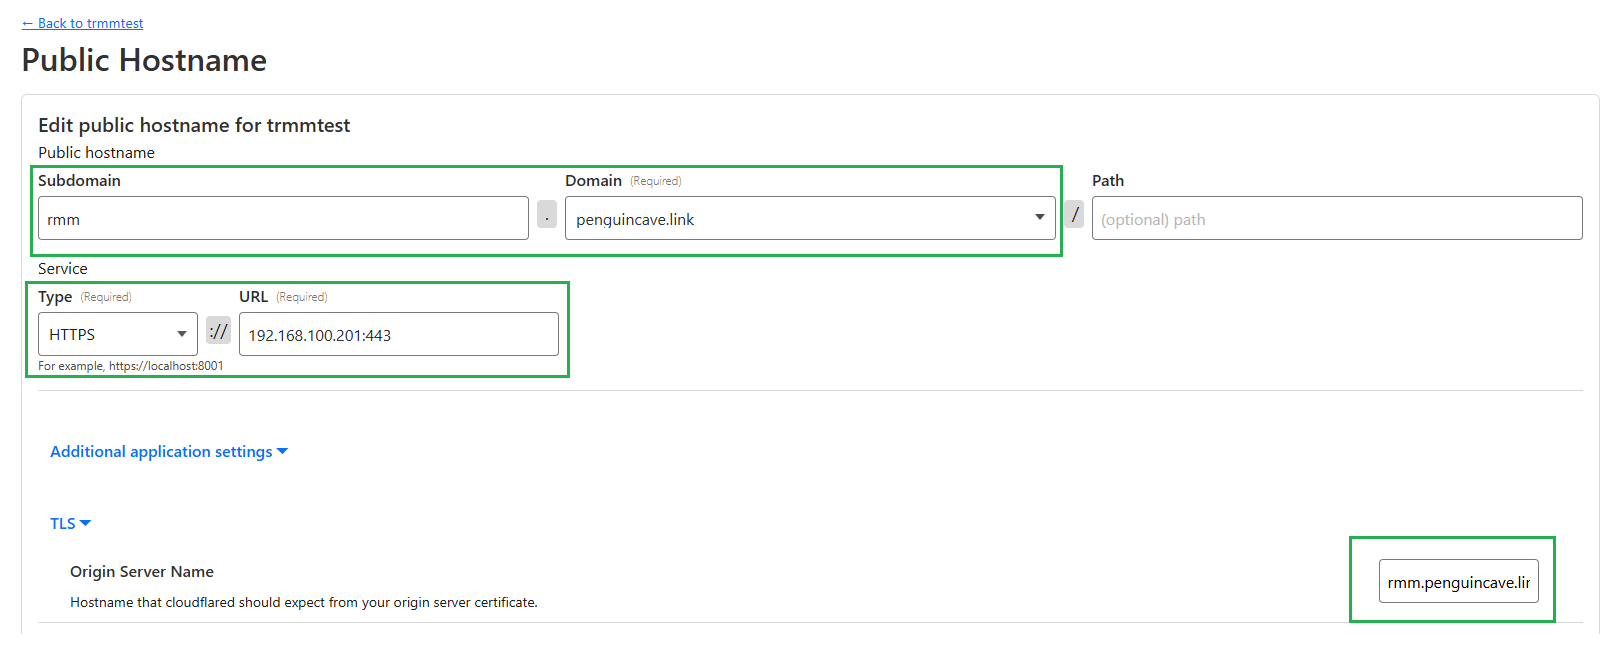
Click Next, then add the public hostnames to route traffic using your api, mesh, and rmm subdomains. You will also need your server's private IP on the Service field group using HTTPS port (443)

For mesh, we need to use HTTP and port 4430.
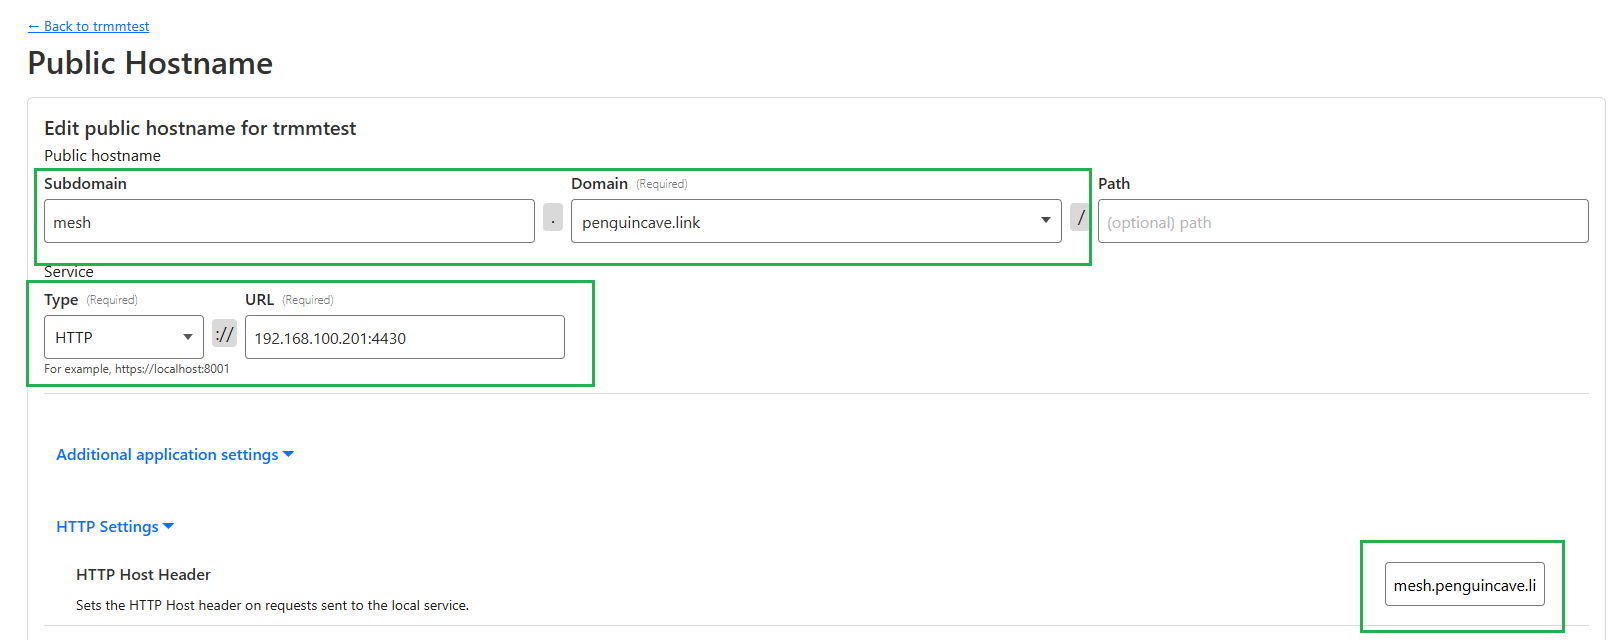
For rmm, HTTPS (443) is required.
3. Create a user
Create a user and add it to the sudoers group by running the commands below. We will use tactical for this guide.
useradd -m -G sudo -s /bin/bash tactical
passwd tactical
You would also want to ensure that the tactical linux user has passwordless sudo:
sudo visudoAdd the following line to the end of the file which will be opened by running the above command, then save and exit the file.
tactical ALL=(ALL:ALL) NOPASSWD:ALL4. Setup the Firewall (optional but highly recommended)
ufw default deny incoming
ufw default allow outgoing
ufw allow https
For SSH, you can specify which IP to allow (recommended, more secure):
ufw allow proto tcp from X.X.X.X to any port 22
ufw allow proto tcp from X.X.X.X to any port 22
Or allow it from everywhere:
ufw allow sshEnable and activate the firewall:
ufw enable && ufw reload5. Run the installation Script
Tip: If you can snapshot do that now so you can quickly restore to this point again and re-run the install in case something goes wrong with the install script.
wget https://raw.githubusercontent.com/amidaware/tacticalrmm/master/install.sh
chmod +x install.sh
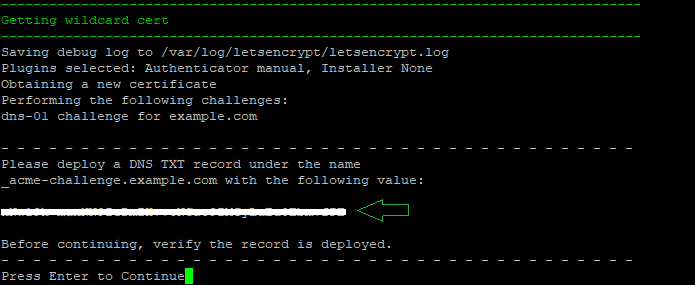
./install.shAnswer the initial questions when prompted. Replace example.com with your domain.

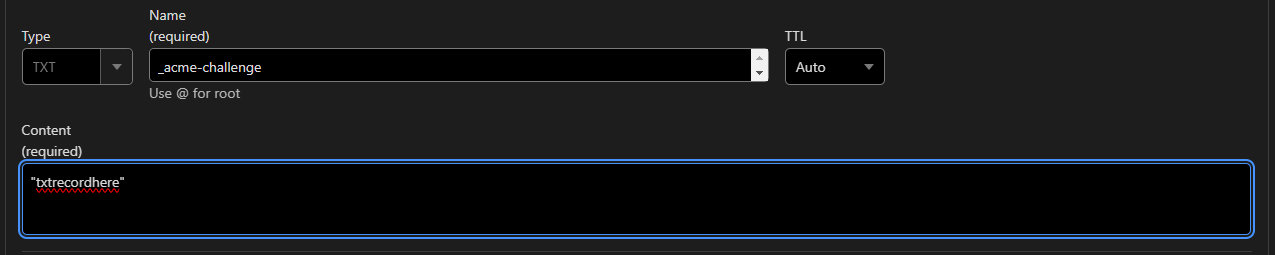
Add the TXT record prompted from the installation script in your DNS manager for Let's Encrypt wildcard certificate.
Create a login for the RMM web UI

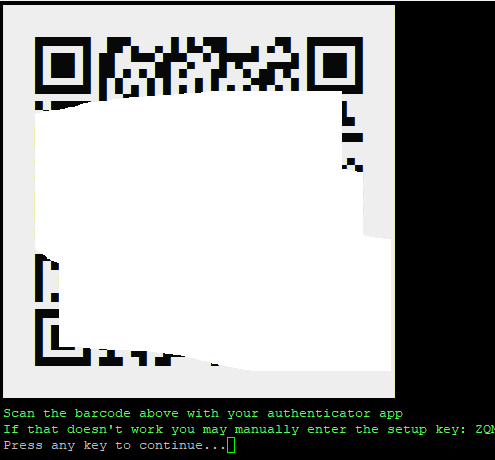
Setup 2FA
Installation completed! Login to the web UI using the credentials you made earlier. Don't forget to also take note of your MeshCentral credentials.
